


Summary
- Camera distance and lens choice directly affect facial perspective in a portrait
- Portrait Mode is not necessary for every photograph of a person
- Excessive computational blur often makes the result look less natural
- Focus should be checked on the face and preferably the nearest eye
- Exposure should be adjusted with priority given to skin tones
- Increasing the distance between the subject and background improves separation
- Soft natural light is usually preferable to a phone's small LED flash
- Beauty and Face Retouching usually look more natural when used sparingly
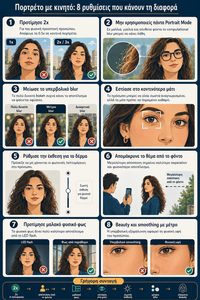
- 1. Do not automatically start at 1x — choose the right focal length first
- 2. Portrait Mode or normal Photo? Portrait is not always necessary
- 3. Do not turn background blur all the way up
- The “f/1.4” on screen is not necessarily a real f/1.4 aperture
- 4. Focus on the eye — not simply “somewhere on the face”
- 5. Expose for the skin, not the entire frame
- 6. Move the subject away from the background before asking for more bokeh
- 7. Turn off the flash and find better light
- 8. Beauty mode and Face Retouching: less is usually more
- 50MP and RAW: more resolution does not automatically mean a better portrait
- A quick smartphone portrait recipe
- What we think
- Frequently asked questions
A good smartphone portrait depends far less on how powerful Portrait Mode is and much more on lens choice, distance, exposure, focus and how carefully computational blur is used.
The discussion surrounding the rumored variable aperture of the iPhone 18 Pro has brought depth of field and natural bokeh back into focus. PTTL has already examined why genuine variable aperture remains an important missing feature in most smartphone cameras, but until more phones offer meaningful optical control, proper technique can make a much larger difference than another AI filter.
This matters because today’s iPhone, Galaxy and Pixel devices can create remarkably convincing portraits, but software cannot correct poor perspective, blown skin highlights, incorrect focus or bad lighting. Apple, Google and Samsung now also provide different levels of control over portrait blur and processing, meaning the automatic default is not necessarily the best choice.
1. Do not automatically start at 1x — choose the right focal length first
One of the biggest mistakes in smartphone portrait photography happens before the shutter is even pressed: the photographer simply uses whichever camera opens first.
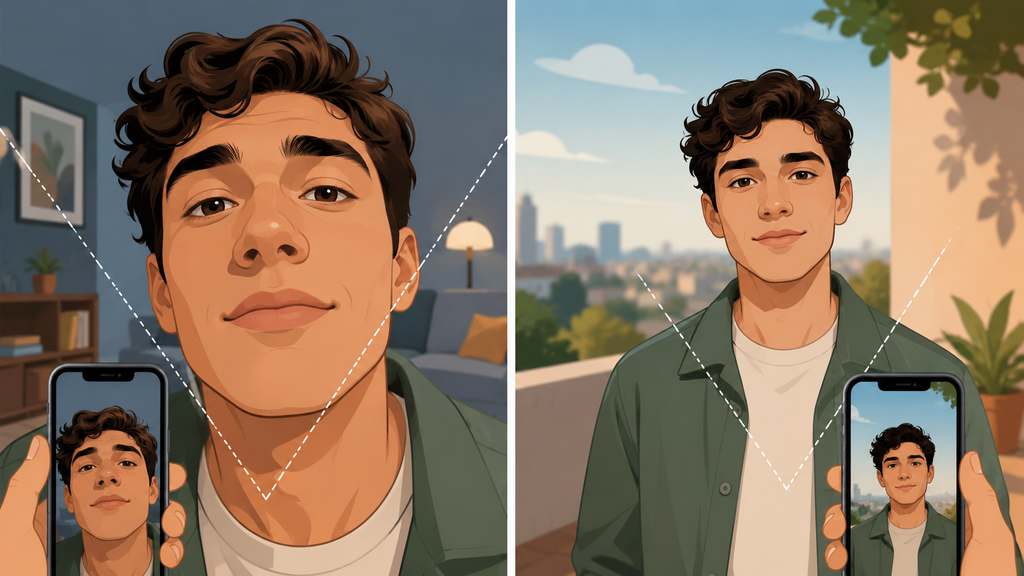
The main 1x camera is usually the strongest in terms of image quality, but its relatively wide field of view means users often move too close to a face when trying to fill the frame with a headshot.
The issue is not simply that a wide-angle lens “distorts” a face. Perspective is primarily determined by camera-to-subject distance. When the camera gets very close, the nose becomes proportionally much closer to the lens than the ears and the back of the head, making it appear larger and producing less natural facial proportions.
For a conventional portrait, a 2x or 3x option often encourages the photographer to move farther back and produces a more flattering perspective. That does not mean every 2x or 3x option is superior: on many smartphones, that zoom level may be a crop rather than a dedicated telephoto camera.
A practical starting point is simple.
For a headshot or half-body portrait, start with 2x or a short real telephoto lens when there is enough light.
For an environmental portrait where the surroundings are part of the story, the 1x camera is often ideal.
The 0.5x camera should be used deliberately for a creative look rather than as a default portrait lens, particularly when a face is close to the edge of the frame.
In low light, however, the main camera may still outperform a darker telephoto module with a smaller sensor. Lens selection should therefore be based on the scene as well as the zoom number.
2. Portrait Mode or normal Photo? Portrait is not always necessary
The second major choice is whether the image needs to be captured in Portrait Mode at all.
Portrait Mode is extremely useful when the background is distracting and stronger visual separation is desirable. It is not mandatory for every photograph containing a person.
Loose hair, glasses, transparent objects, thin details, gaps between fingers or a background with similar colors can make depth mapping more difficult. Samsung officially notes that portrait blur may not work properly when the subject is moving, thin or transparent, or has a similar color or pattern to the background.
Modern iPhones provide even greater flexibility. On supported models, when regular Photo mode captures depth information for a person, dog or cat, the portrait effect can be applied after capture in Photos. Apple also allows the focus point to be changed later in compatible Portrait images.
When in doubt, therefore, a clean Photo-mode capture can sometimes be the safer option — particularly on an iPhone that stores the necessary depth information.
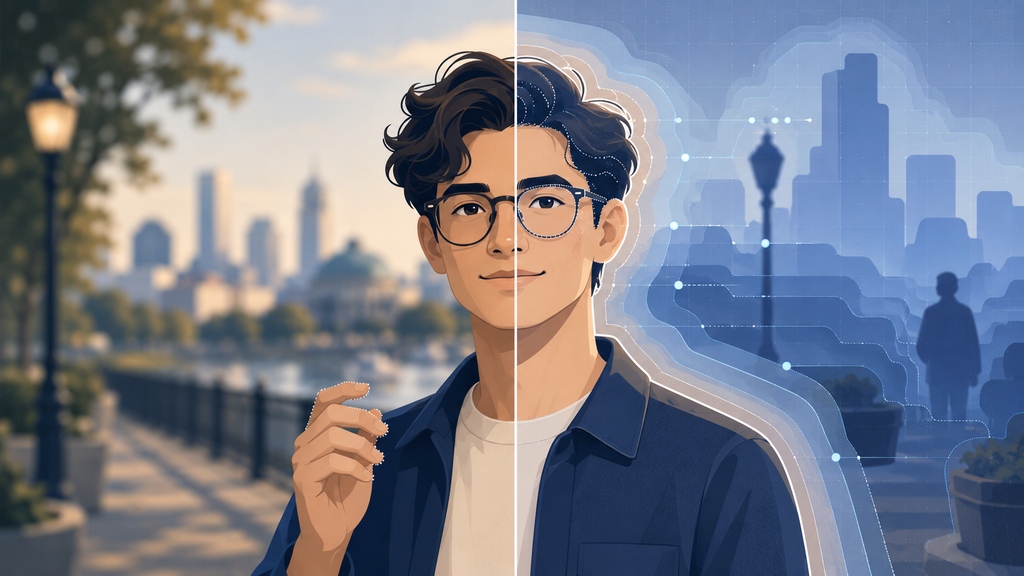
3. Do not turn background blur all the way up
This may be the setting that ruins more smartphone portraits than any other.
Extremely strong blur can look impressive at first glance, but it often makes an image look more processed rather than more professional.
On the iPhone, Depth Control displays a control resembling an aperture adjustment. On most current iPhones, however, this does not physically open or close iris blades inside the lens. Apple itself describes Aperture/Depth Control as a way to adjust the amount of background blur in the portrait effect.
Samsung similarly provides an Effect strength control for Portrait blur, while Pixel users can adjust a Blur slider later in Google Photos.
The better choice is usually less blur than instinct initially suggests.
In a real optical system, the background does not suddenly become uniformly creamy immediately behind a strand of hair. Focus transitions gradually depending on distance.
The more extreme the computational effect becomes, the more obvious mistakes around hair, ears, glasses and objects close to the focus plane can become.
The “f/1.4” on screen is not necessarily a real f/1.4 aperture
This is where the subject connects directly with variable aperture.
When a smartphone displays a value such as f/1.4 or f/2.8 inside a depth-control interface, that value can represent a simulated blur parameter rather than a physical change to the camera’s real aperture.
That is why the rumored variable aperture of the iPhone 18 Pro is photographically interesting. PTTL has already covered reports that Apple is preparing a variable-aperture main camera for the iPhone 18 Pro models. If implemented, that would involve a physical change inside the optical system rather than simply altering the intensity of computational blur.
This does not mean software bokeh is bad. It means it is a different tool and should be treated as such.
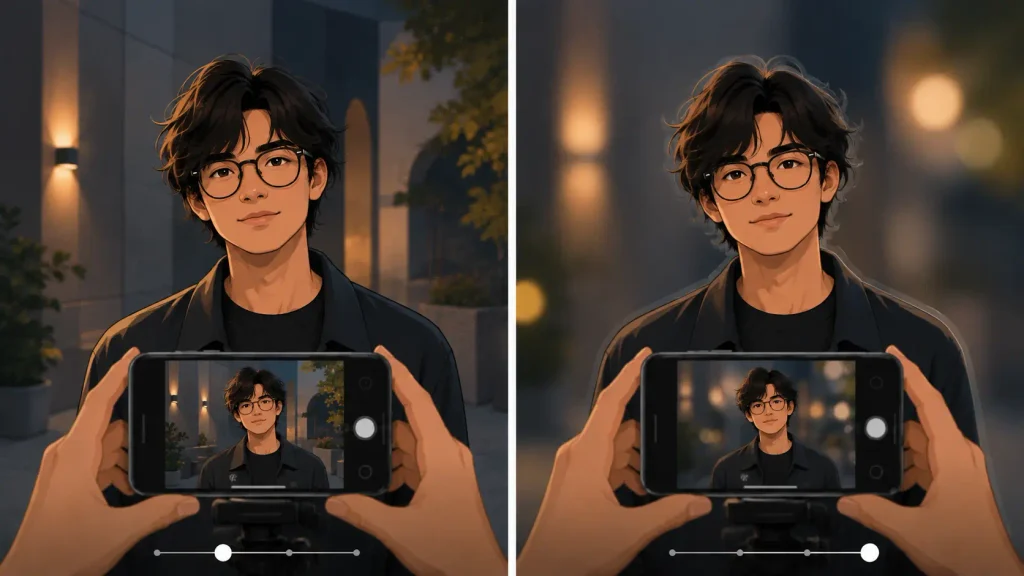
4. Focus on the eye — not simply “somewhere on the face”
In a close portrait, the eye is usually the first place a viewer checks for sharpness.
Modern smartphones perform excellent face detection, but there is no reason to assume autofocus always chooses exactly the intended plane.
Tapping the nearest eye or face before taking the photograph remains useful, particularly when other people or objects are present in the frame.
On iPhone, Apple allows users to tap to move the focus area and touch and hold for AE/AF Lock, preventing focus and exposure from changing while the composition is adjusted.
On Pixel devices, tapping the subject activates tracking focus, and focus and exposure can be locked on the selected subject.
For a static portrait, this small intervention may matter more than any AI adjustment made afterward.
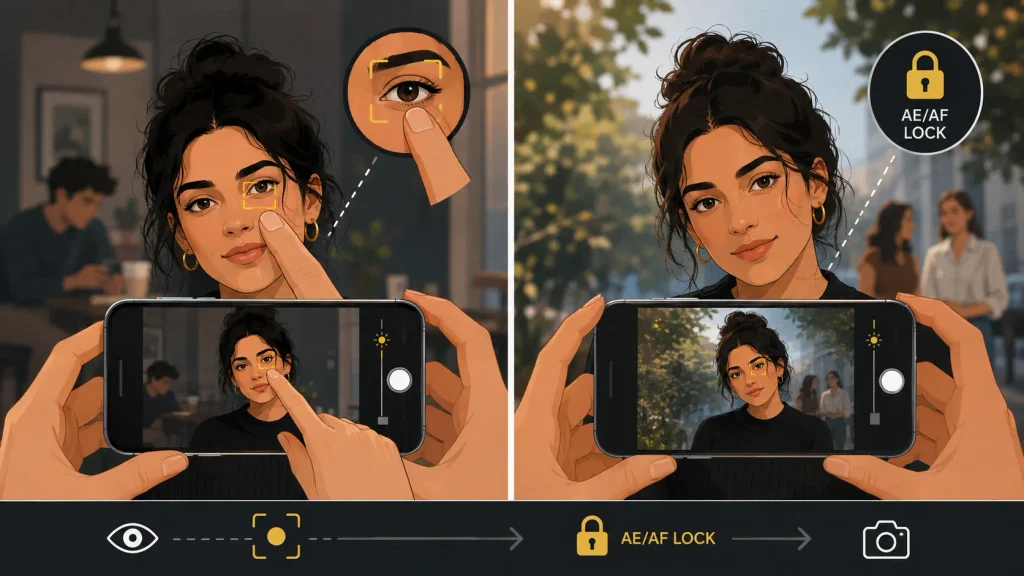
5. Expose for the skin, not the entire frame
Smartphones have excellent HDR, but the face remains the most important element in a portrait.
If the person is standing beside a bright window, beneath a bright sky or in front of a strongly illuminated background, automatic exposure may produce a result that is not ideal for the face.
The better process is to tap the face first and then evaluate the skin tone.
On iPhone, exposure can be moved manually upward or downward after tapping to focus. Apple also provides a separate Exposure control that can be preserved for subsequent photographs.
There is no magic number such as “always use -0.7 EV.” Dark skin, white clothing, backlighting and nighttime scenes all require different treatment.
The practical objective is to preserve important highlight detail in the face without unnecessarily darkening the entire photograph.
For phones with genuine Pro or manual modes, shutter speed deserves attention too. Camera stabilization corrects hand movement, not movement by the person being photographed. For a relatively still portrait, around 1/125 sec can be a useful starting point, while children or moving subjects often require 1/250 sec or faster, increasing ISO when necessary.
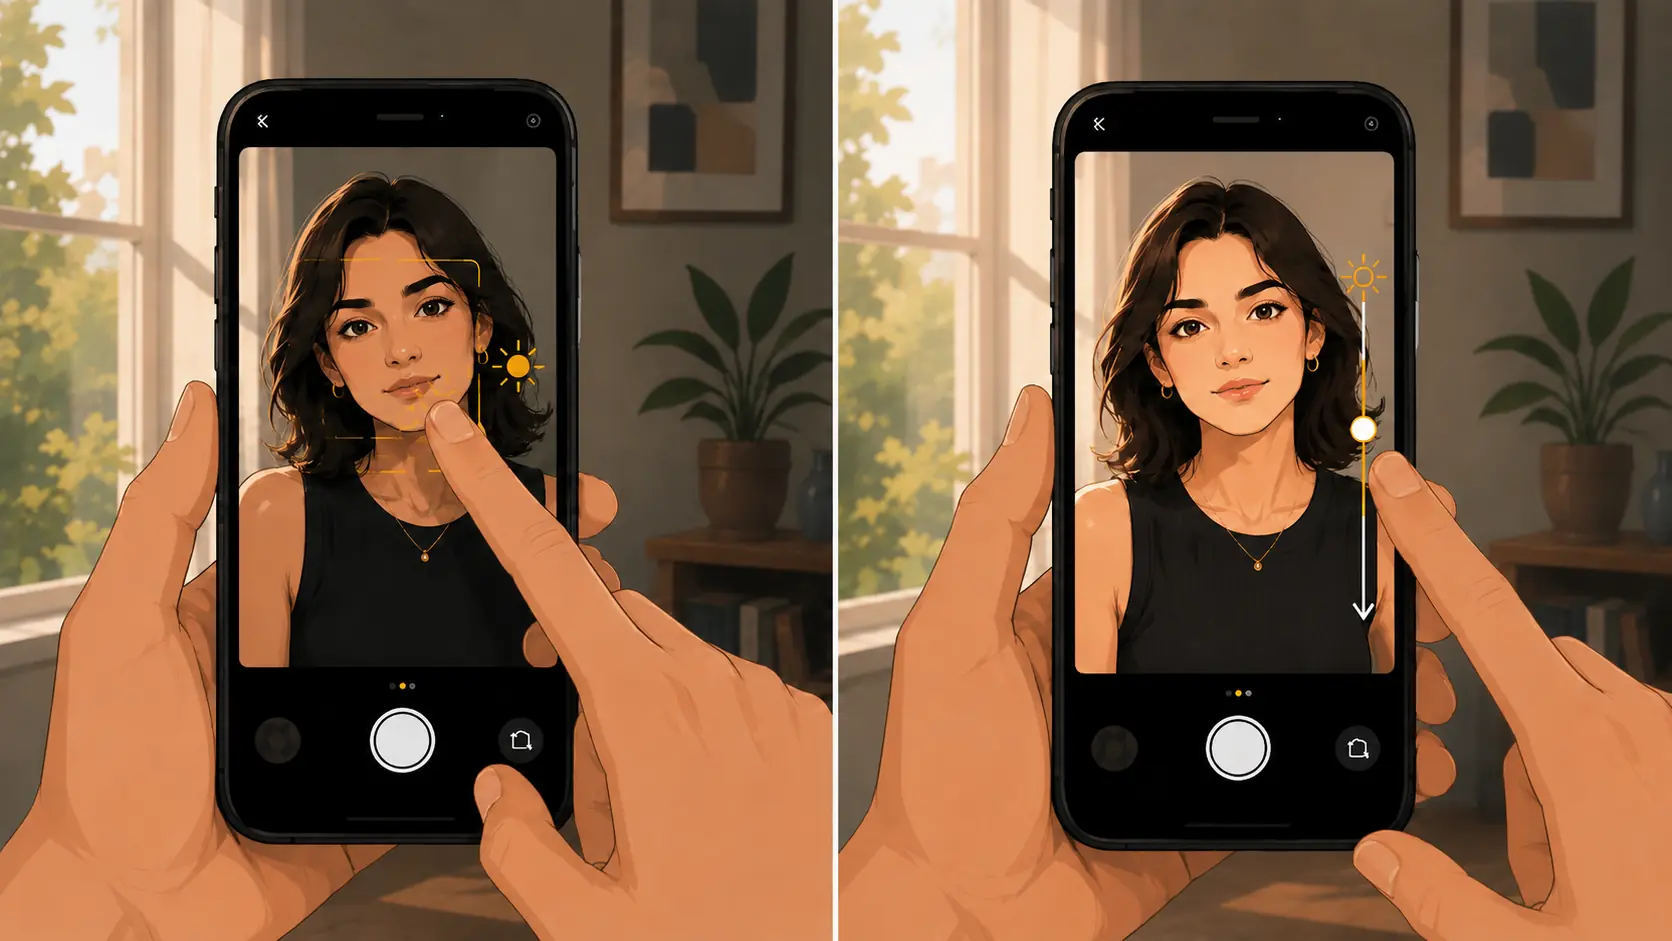
6. Move the subject away from the background before asking for more bokeh
This is not a menu setting, but it functions like one of the strongest controls available in portrait photography.
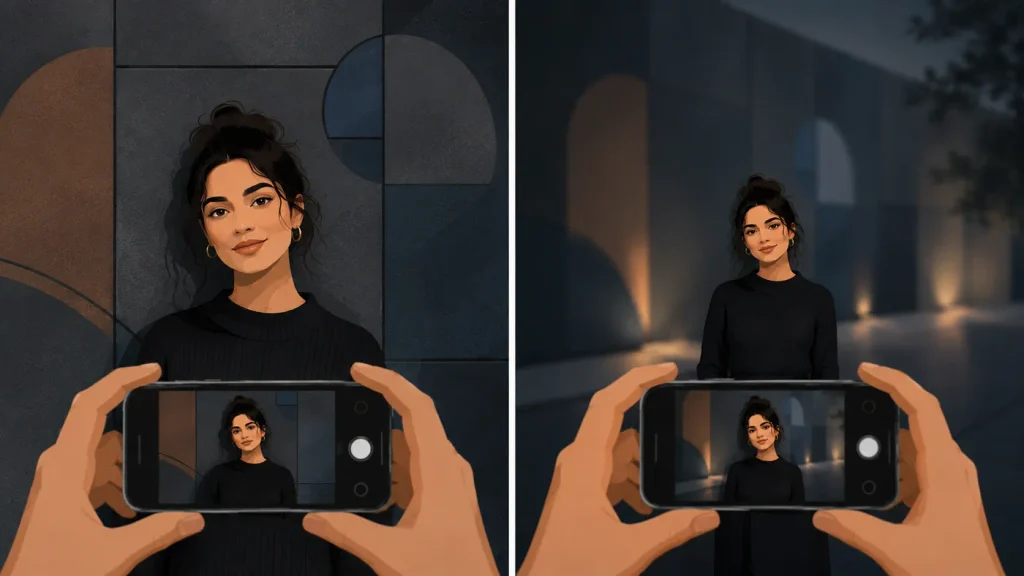
If a person stands directly against a wall, even a conventional camera has less ability to create dramatic separation than it would if the same wall were several meters behind the subject.
Distance between the subject and background has a direct effect on how far out of focus the background can appear.
It also helps computational Portrait Mode because it gives the depth system cleaner visual layers and reduces cases where the subject becomes confused with objects directly behind them.
Before increasing the blur slider, therefore, try the simplest possible change: move the subject two or three steps forward and reframe from slightly farther away.
The difference is often greater than changing any software setting.
7. Turn off the flash and find better light
For portraits, a large soft window is usually a better accessory than any AI portrait effect.
A phone’s small LED flash is positioned almost directly on the lens axis. It therefore produces flat, relatively hard illumination, strong skin reflections and often removes the natural modeling of facial features.
Before switching on the flash, look for:
- light from a large window
- open shade outside a building
- light near a doorway or balcony door
- soft light shortly before sunset
- shade with a bright open sky in front of the subject
The face does not need to point directly toward the light. A slight turn creates a difference in brightness between the two sides of the face and adds shape.
In very low light, current smartphones can combine portrait processing with night photography. Apple says Night mode can activate for Portrait images using the 1x camera on supported iPhones, while Pixel Night Sight can also activate automatically in Photo or Portrait mode.
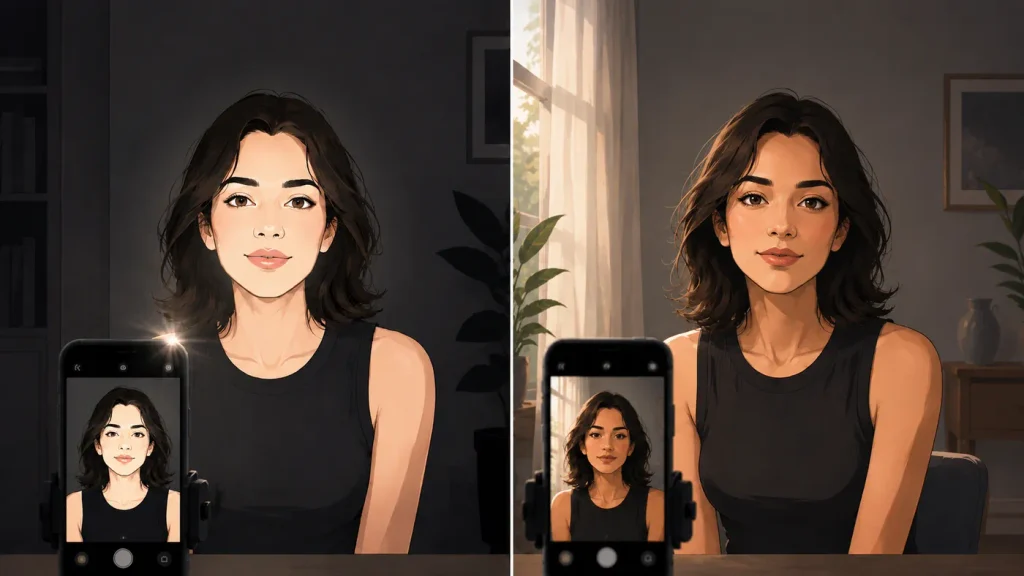
The principle remains the same: the better the real light, the less computational photography has to rescue.
8. Beauty mode and Face Retouching: less is usually more
Many smartphones offer skin smoothing, beauty filters, face shaping or retouching.
These tools are not inherently a problem. They become one when applied so aggressively that natural skin texture, fine lines and facial characteristics disappear.
On Pixel devices, for example, Google provides Face Retouching controls that can affect skin texture, under-eye appearance and eye brightness.
For a natural portrait, a good starting point is to keep retouching off or at low intensity and increase it only when there is a specific reason to do so.
The same applies to Portrait Lighting. Apple provides Natural, Studio, Contour, Stage and other options, with adjustable intensity. These can be useful, but a strong Studio or Contour effect does not automatically improve every face.
50MP and RAW: more resolution does not automatically mean a better portrait
Megapixels are another option frequently treated as though there were only one correct answer.
High resolution is useful when there is plenty of light, the subject remains relatively still and the photographer needs significant cropping or a larger print. It is not a requirement for better bokeh or better facial lighting.
Google, for example, supports 50MP capture on its Pro Pixel phones, and on the Pixel 10 Pro and Pro XL high resolution can also be used in Portrait mode.
In low light or when the person is moving, capturing a clean image should take priority over maximizing pixel count.
RAW is similarly useful when the photographer genuinely intends to adjust exposure, white balance and color afterward. For a quick portrait going directly to social media, the phone’s carefully processed computational JPEG or HEIF may be more practical and already highly optimized.
A quick smartphone portrait recipe
For a straightforward outdoor portrait, a safe sequence is:
- Start with 2x or a short telephoto option if there is enough light.
- Move the subject well away from the background.
- Find open shade or soft side lighting.
- Tap the nearest eye or face to confirm focus.
- Check exposure before taking the photograph.
- Start with moderate Portrait blur rather than maximum strength.
- Keep Beauty and smoothing low or disabled.
- Capture one regular Photo-mode image as an alternative.
This approach is more useful than memorizing a single blur value and applying it to every person and every scene.
PTTL has also collected the most common mistakes in smartphone photography and video and how to correct them for readers looking to improve their mobile images beyond portrait photography.
What we think
Modern smartphones can create excellent portraits, but the biggest improvement usually does not come from more AI or stronger blur.
It comes from proper distance, appropriate focal length, good light, controlled exposure and more restrained use of computational bokeh.
Real variable aperture may eventually give users more genuine optical control over depth of field. Until then, even the best Portrait Mode performs much better when it is given a strong photographic foundation.
Perhaps the most useful approach is to treat a smartphone not as a device that should automatically “fix” the portrait, but as a camera with specific limitations and tools. When those tools are used deliberately, the improvement is often more obvious than replacing the phone every year.
Frequently asked questions
Which zoom level is best for smartphone portraits?
For conventional portraits, 2x or a short telephoto option often helps because it allows more distance from the face and produces a more natural perspective. In low light, however, the 1x main camera may offer better image quality.
Should Portrait Mode always be used?
No. Complex hair, glasses, thin objects or difficult backgrounds can expose errors in computational blur. A normal Photo-mode capture can often be the safer alternative.
How much blur should I use?
There is no universal ideal value. A more natural result is usually achieved with moderate blur and greater real distance between the person and background.
Is the f-number in Portrait Mode a real aperture?
Not necessarily. On phones with a fixed physical aperture, values shown in depth-control interfaces can describe simulated depth-of-field intensity rather than a mechanical change in the lens. Apple, for example, describes Depth Control as an adjustment to background blur.
Are 50MP portraits better?
Not in every situation. Higher resolution helps in good light and when cropping or additional detail is required, but it does not create better bokeh or better lighting by itself.