

Summary
- The final photograph was built from 30 frames captured within seconds
- Exposure bracketing covered a range from 1/1000 to 4 seconds
- Bracketing preserves bright and dark detail while stacking reduces noise
- A lens hood, shading and clean optics limit flare from streetlights
- A lunar eclipse does not require a special solar filter
- What Andrew McCarthy did
- 1. Set up correctly before choosing settings
- 2. Expose for the Moon, not the black sky
- 3. Bracket for dynamic range
- 4. Stack for cleaner detail
- 5. Handle light pollution
- 6. What a smartphone can do
- 7. Safety is different from a solar eclipse
- Practical processing checklist
- What we think
- Frequently asked questions
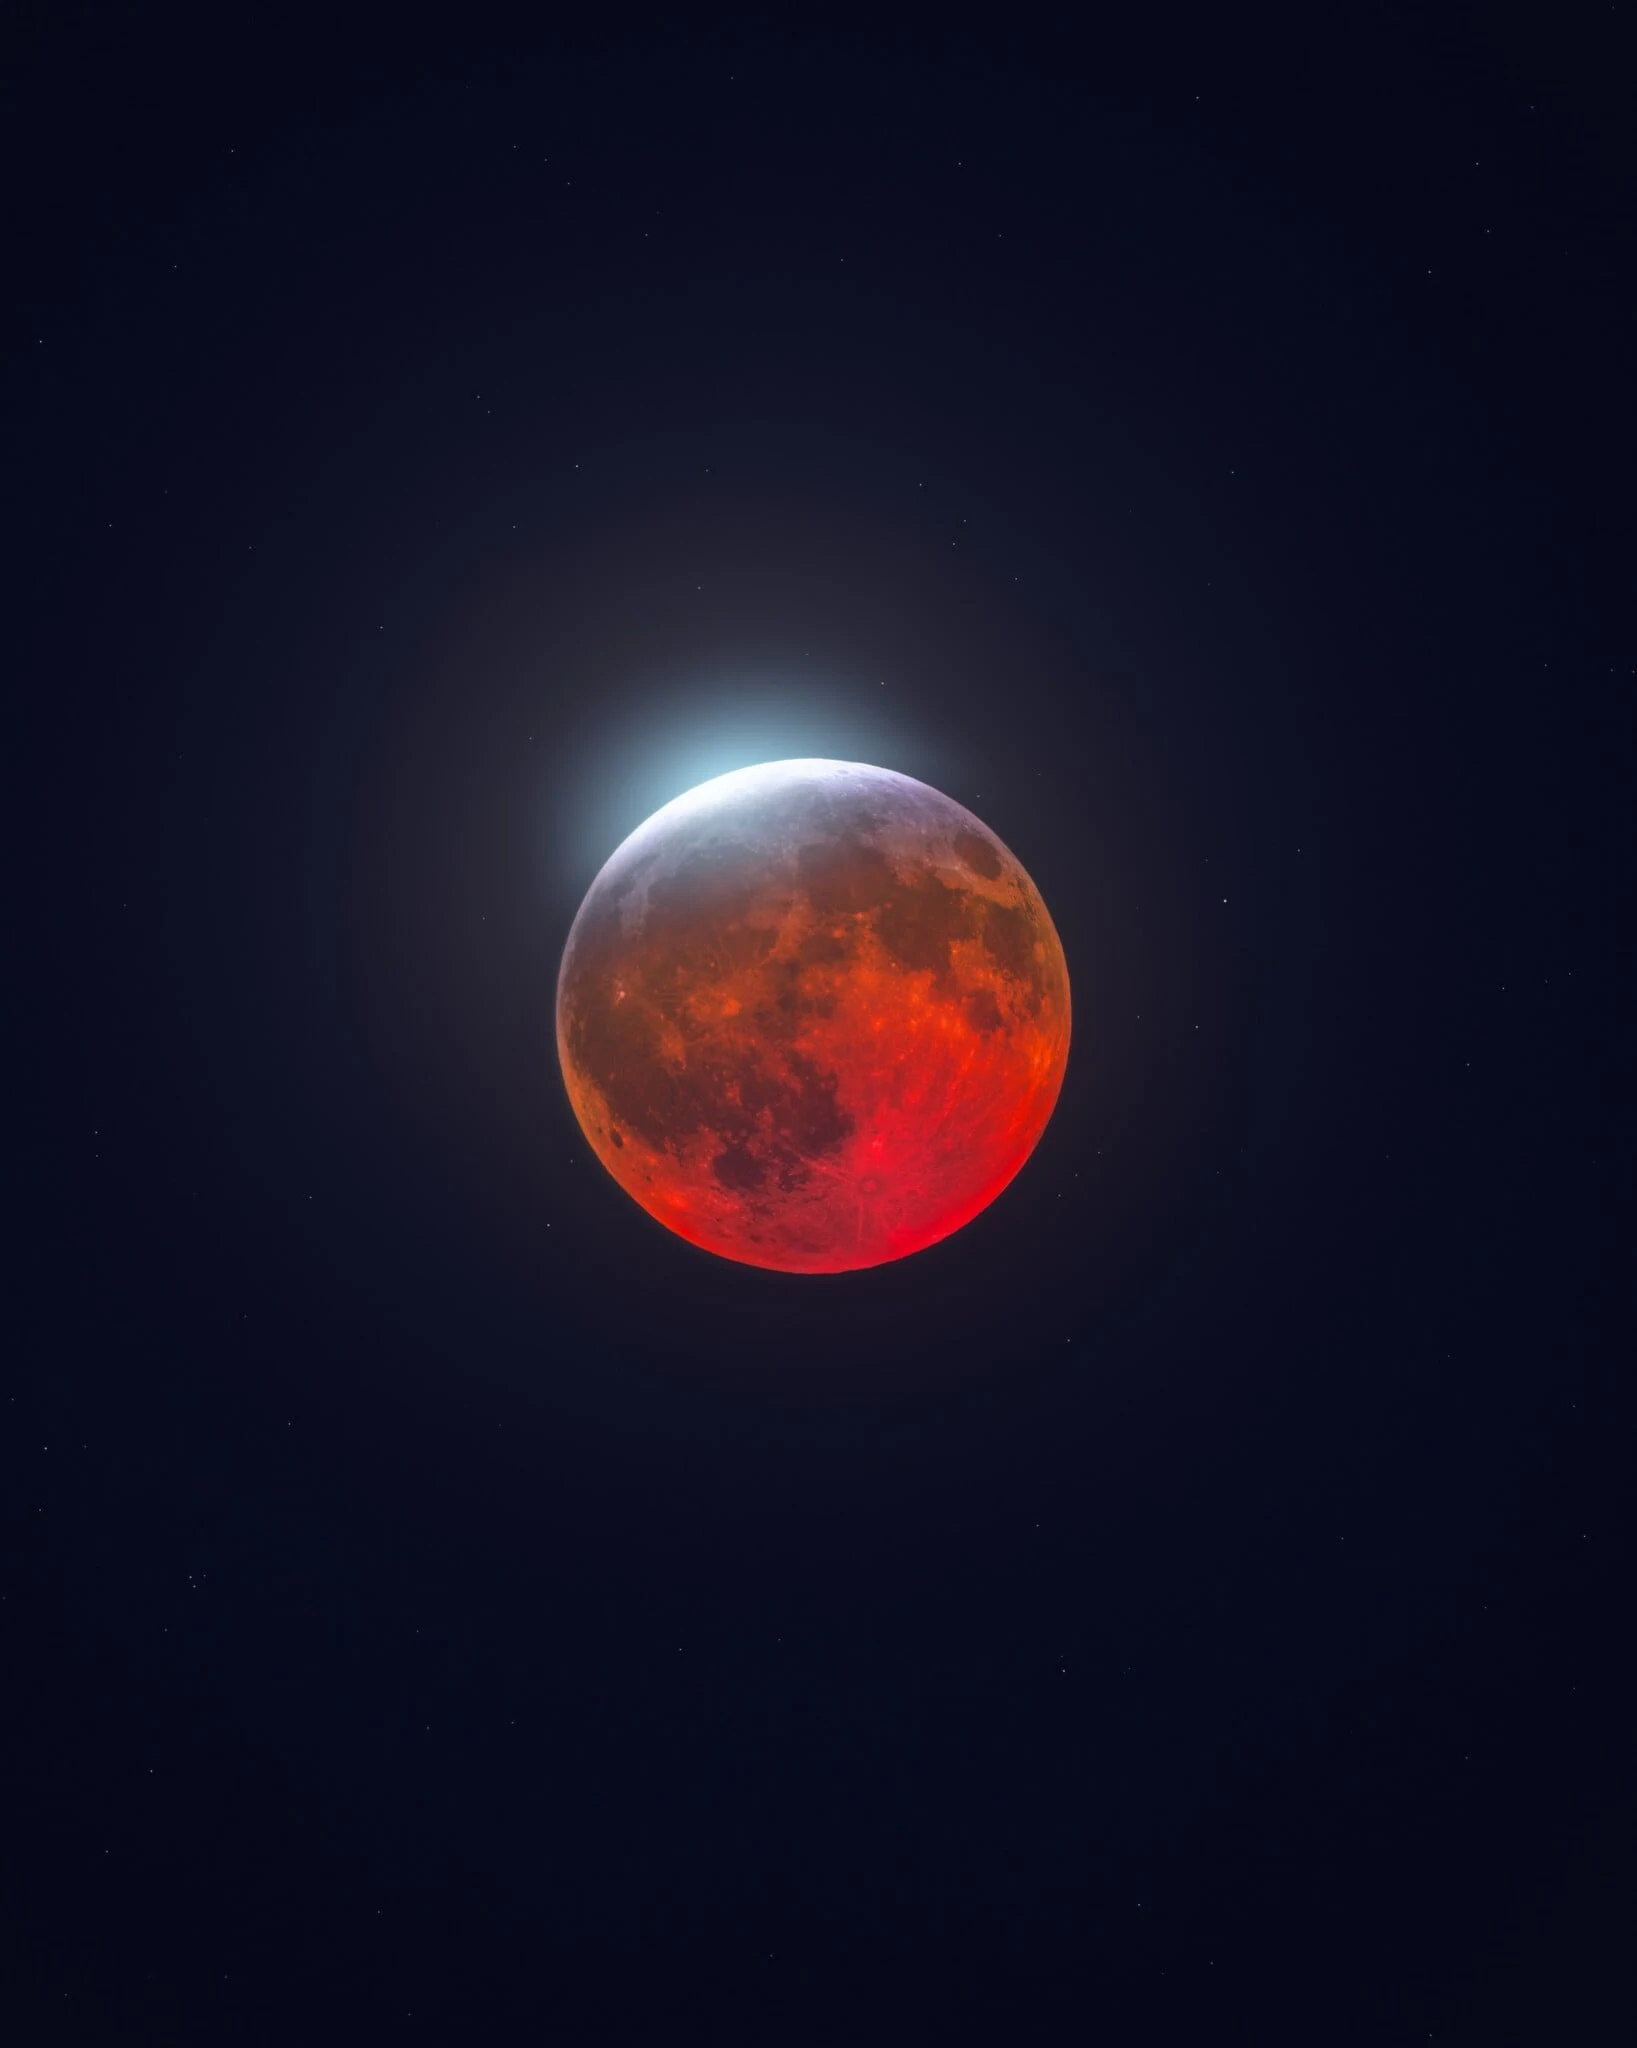
Andrew McCarthy proved that a striking lunar-eclipse photograph does not require a mountain or dark sky: he worked from a Florida hotel parking lot under glaring streetlights and combined 30 frames bracketed from 1/1000 to 4 seconds.
The deep partial lunar eclipse of August 28, 2026 placed about 96% of the Moon inside Earth’s umbra. The red colour was visible to the eye, but McCarthy’s final image preserved the dark surface, thin bright rim and surrounding stars at the same time.
The case is useful because it shows how to solve three different problems: extreme brightness range with bracketing, noise and atmospheric instability with stacking, and unwanted reflections from artificial light through careful positioning. It is not a recipe with one “correct” setting but a workflow adaptable to any eclipse.
What Andrew McCarthy did
The astrophotographer had equipment in Arizona, Texas and Florida as cloud forecasts threatened the event. When the sky cleared in Florida, the available location was a Quality Inn parking lot with bright lights close to the lens.
He captured 30 images within a few seconds so the shadow on the Moon would not move significantly. He also bracketed exposures from 1/1000 to 4 seconds. Fast frames protected the bright rim, while slower frames revealed the red region and much fainter surroundings.
The result complements PTTL’s images of the eclipse from Greece and around the world, but here the main value is the method rather than only the spectacle.
1. Set up correctly before choosing settings
NASA recommends starting with equipment you already own and taking many test frames. A telephoto lens makes the Moon large in the frame, but focal length depends on sensor size and whether the goal is a close-up or an environmental composition.
- A stable tripod with every leg on solid ground
- A lens hood and removal of an extra protection filter if it creates reflections
- Manual focus on lunar craters using magnified live view
- RAW capture, fixed white balance and flash disabled
- A two-second timer or remote release to avoid touching the camera
In a parking lot, vibrations from cars matter too. The best position is not always the darkest one, but a place where a building, tree or vehicle blocks direct lamp glare without blocking the Moon.
2. Expose for the Moon, not the black sky
A meter can overexpose the Moon because it sees a mostly dark background. Manual mode is safer: begin with low or moderate ISO, an aperture near the lens’s sharpest range and a shutter speed fast enough to prevent lunar motion blur.
Brightness changes dramatically during an eclipse. Check the histogram and highlight warnings, preserving detail in the bright area. McCarthy’s 1/1000-to-4-second range describes his extreme bracket and should not be copied mechanically. Sensor, aperture, ISO, focal length and eclipse magnitude all change the result.
3. Bracket for dynamic range
Exposure bracketing creates a sequence with different shutter speeds. At each key moment, retain at least one fast frame for the bright rim, one middle exposure for the lunar surface and one slower exposure for the shadow and faint stars.
If the camera supports AEB, combine it with continuous shooting so the sequence finishes quickly. If its range is insufficient, change shutter speed manually without touching focus or framing. Long delays make blending harder because the Moon and shadow boundary move.
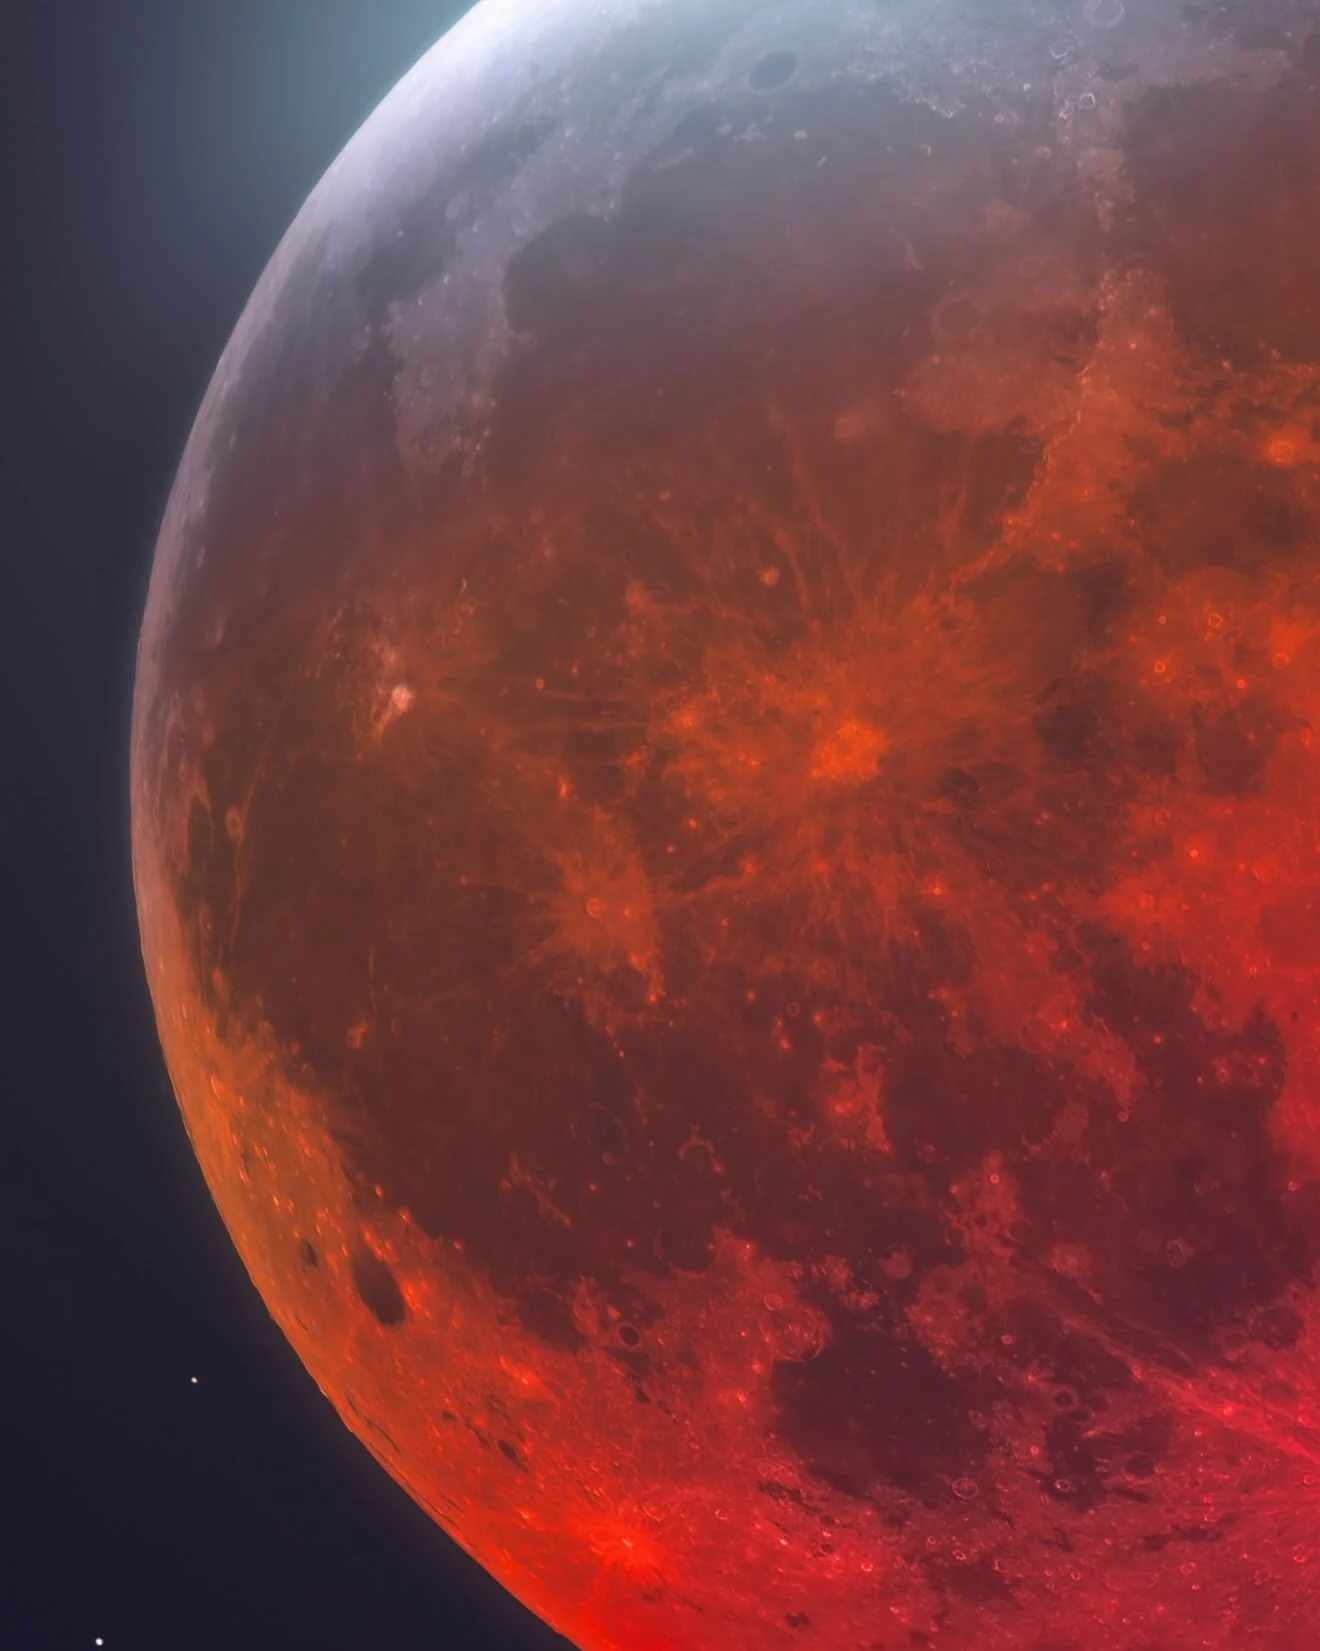
4. Stack for cleaner detail
Stacking is not the same as bracketing. Stacking combines similar exposures to reduce noise and benefit from moments of steadier atmosphere. Bracketing combines different exposures to hold bright and dark detail in one result.
Align frames on craters or fixed lunar features, not on the canvas edge. Reject blurred or atmospherically distorted images. A mean or median stack reduces random noise; exposure blending comes afterwards with masks designed to avoid artificial halos.
Capturing the 30 frames within seconds was critical. Over a longer interval, both the Moon’s position and the geometry of Earth’s shadow change, so the result no longer represents one moment.
5. Handle light pollution
Light pollution does not erase the bright lunar surface like it can a faint galaxy, but it reduces contrast, colours the sky and creates flare when lamps shine into the lens. Find a position with a natural or built obstacle between the lamp and front element.
- Use a deep lens hood and shade the lens without entering the frame
- Clean the front element because dust and moisture scatter light
- Avoid lifting shadows across the whole image excessively
- Correct gradients and colour casts before stacking
- Keep a layered editing file so the composite can be explained
6. What a smartphone can do
NASA recommends stabilising the phone, disabling flash, focusing on the Moon and lowering brightness until detail appears. A timer reduces shake. A genuine optical telephoto camera is preferable to extreme digital zoom, which merely enlarges a crop.
During a deep eclipse, Night mode or a manual camera app can help, but check whether computational stacking deforms the bright rim. RAW capture, when available, gives more control over brightness and colour.
7. Safety is different from a solar eclipse
A lunar eclipse is safe to view and photograph without special glasses or a solar filter. Earth is shading the Moon and the camera is not pointed at the Sun. This is not true for a solar eclipse, which requires certified protection for eyes and optical equipment.
Practical processing checklist
- Import RAW files without synchronising one exposure across every frame
- Sort files into equal-exposure groups
- Choose the sharpest frames and align on the lunar surface
- Stack each exposure group for noise reduction
- Blend the groups with gentle luminosity masks
- Check for double edges, halos, saturated reds and excessive sharpening
- Use an honest caption that identifies stacking or compositing
For planning, PTTL has already published a guide to eclipse timing, direction and basic camera settings. McCarthy’s technique adds the next level: recovering a scene with enormous contrast and unwanted artificial light.
What we think
The most useful lesson is not that 30 frames or one specific shutter range is mandatory. It is that location does not cancel a photograph when the photographer understands what problem each frame solves. The parking lot offered firm ground and an open view but demanded flare control. Bracketing solved dynamic range and stacking reduced noise. Technique overcame poor conditions without hiding that the final photograph is a composite.
Frequently asked questions
Why use different exposures?
Because the bright rim and red shadow differ by many stops. One exposure often clips the former or loses the latter.
Why capture 30 frames within seconds?
To reduce noise and select the sharpest frames without letting the shadow move significantly across the Moon.
Is a dark sky required?
It helps with stars and a clean background but is not essential for the Moon. In a lit location, preventing direct light from hitting the lens matters most.
Is a special filter required?
Not for a lunar eclipse. Special protection is required when eyes or cameras are pointed toward the Sun.
Can it be done with a phone?
Yes: stabilise it, tap to focus on the Moon, lower exposure, use a timer and prefer a genuine optical telephoto camera over digital zoom.